Getting Started with Certadox
A guided product tour of your vendor compliance dashboard — what every screen does, and how to get real work done, step by step.
What Certadox does
Certadox is a vendor compliance and certificate-of-insurance (COI) tracking platform. It keeps one organized record of every subcontractor or vendor you work with, the documents each one is required to submit, and whether those documents actually meet your coverage rules.
Instead of chasing paperwork by email and manually reading insurance certificates, you set your requirements once. As documents come in, Certadox reads each file, extracts the key details (coverage amounts, expiration dates, policy numbers), and checks them against what that trade is required to carry — then flags anything missing, expiring, or non-compliant so you can approve or reject with confidence.
The left sidebar is your map
Every screen is reached from the dark navigation rail on the left. Your name, role, and Sign Out sit at the bottom; the notification bell is top-right.
Dashboard
Your compliance health at a glance — overall score, key counts, pending work, and recent activity.
Vendors
The full list of vendors, each vendor's profile, their required documents, and compliance status.
Documents
A searchable library of every document across all vendors, with review status and expirations.
Projects
Group vendors by job site or contract to track compliance per project.
Reports
One-click CSV exports for audits, client requests, and leadership reviews.
Settings
Your plan, company profile, document types, per-trade requirements, and team members.
Read your compliance health at a glance
The Dashboard is the home screen. It answers one question fast: how compliant is my vendor base right now, and what needs my attention today?
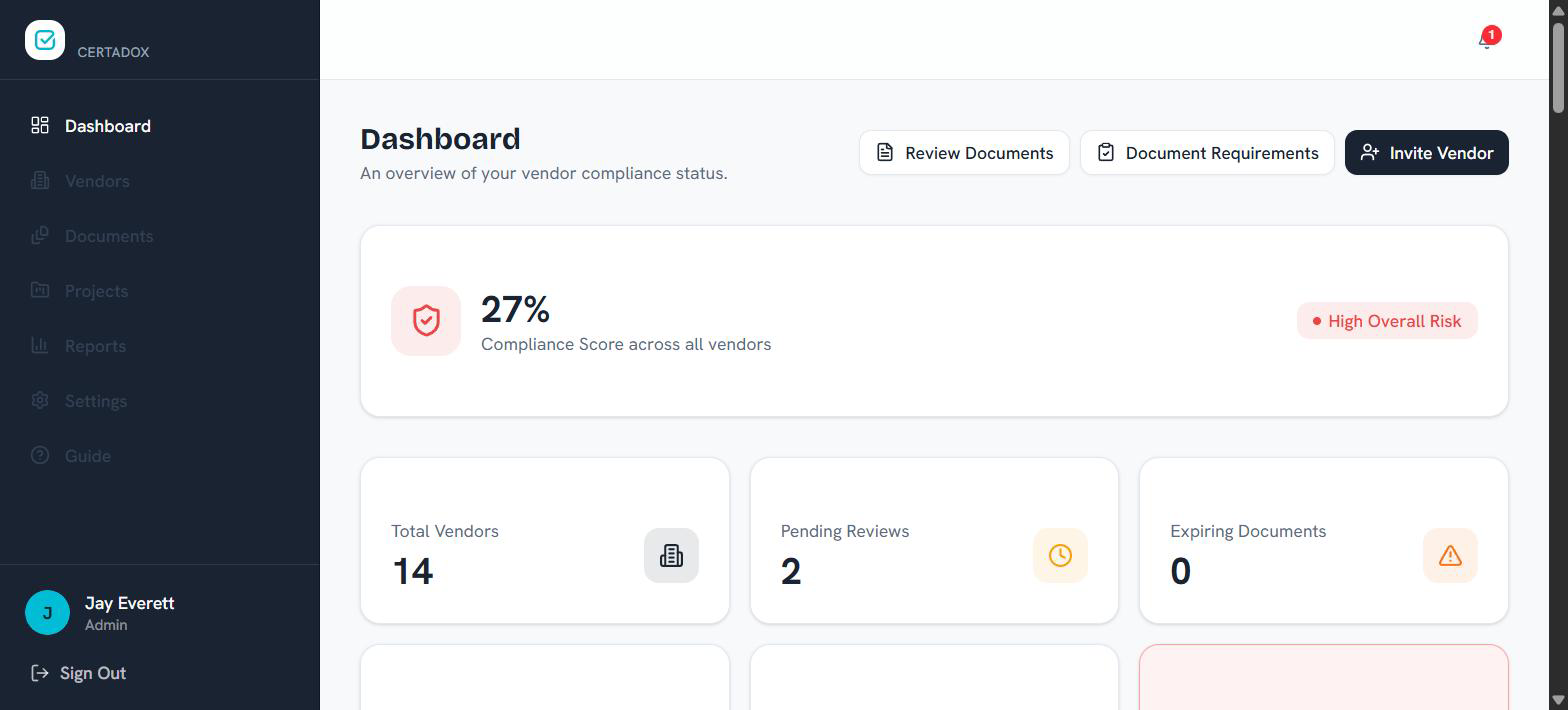
The large Compliance Score is the percentage of all requirements met across every vendor, with a risk banner (e.g. High Overall Risk) beside it. The three buttons at the top right are your fast lanes: Review Documents (jump to pending items), Document Requirements (edit what's required), and Invite Vendor.
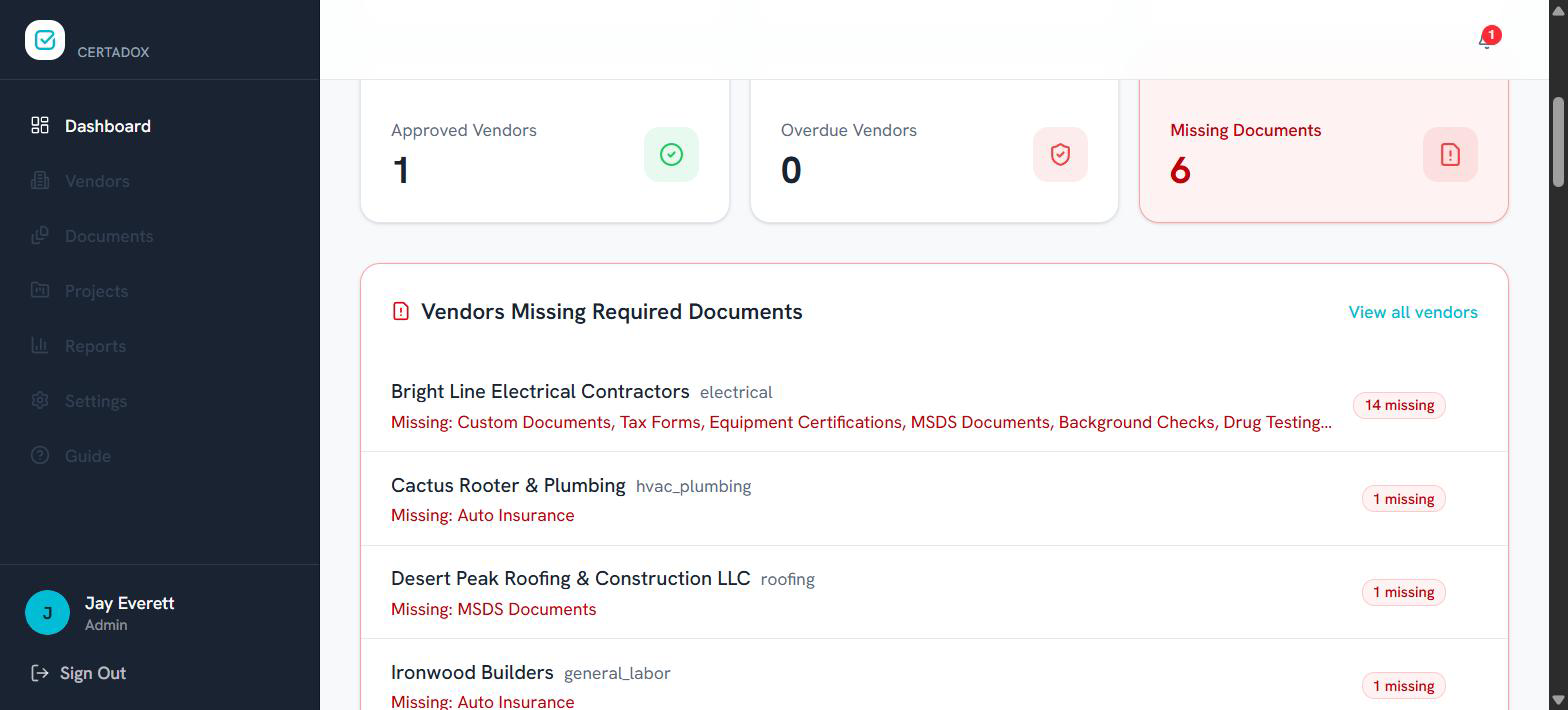
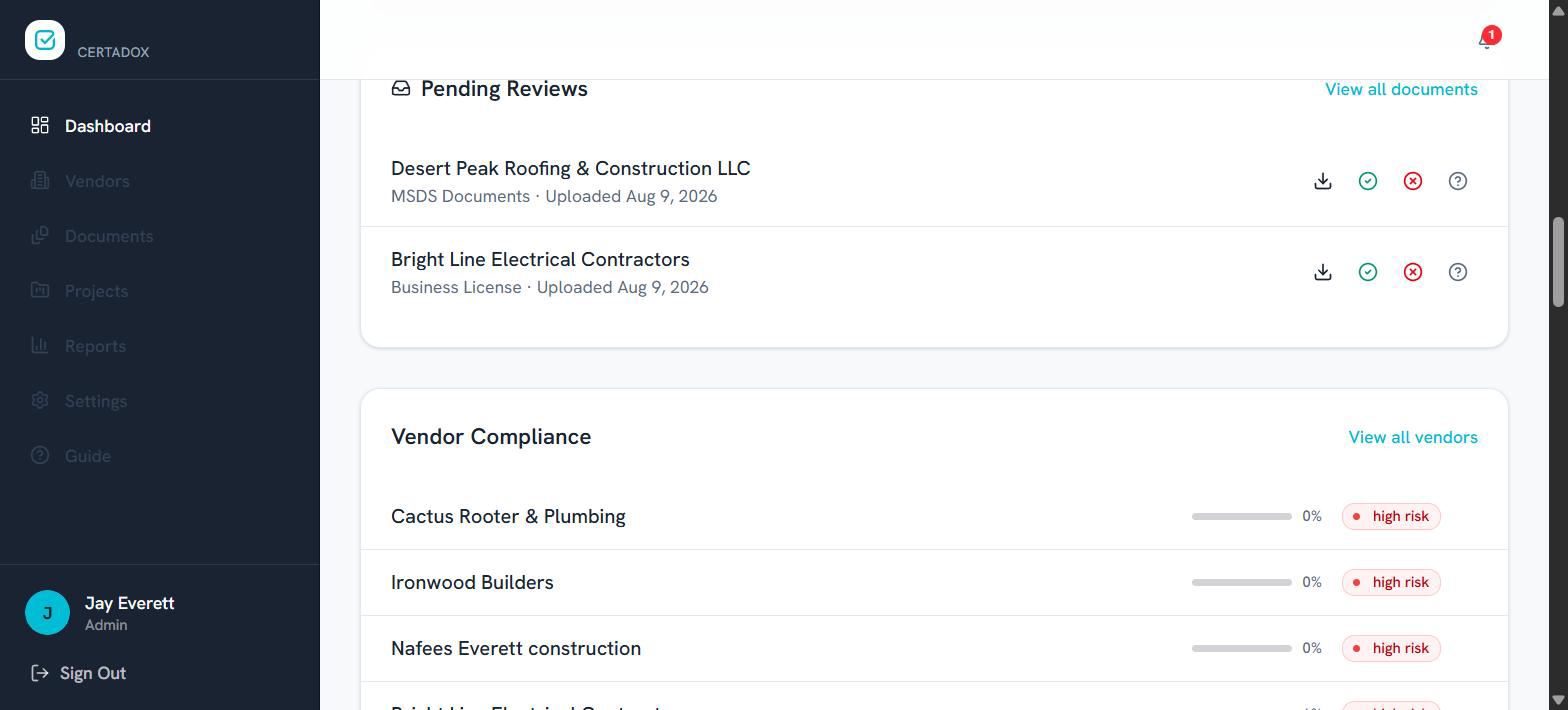
Scroll down and the Dashboard becomes a work queue. Pending Reviews lets you act on a document without leaving the page — each row has quick icons to download, approve, reject, or request more info. Vendor Compliance ranks every vendor by score and risk, and further panels cover Risk Distribution, Expiring Soon, Upcoming Reminders, and a full Recent Activity log.
- 1
Start with the score. A low percentage or a red risk banner means requirements are unmet — the panels below tell you where.
- 2
Clear pending work. Approve or reject documents right from the Pending Reviews panel, or click View all documents to work the full queue.
- 3
Chase what's missing. Use Vendors Missing Required Documents to see exactly which vendor is short which document, then open that vendor to request it.
- 4
Stay ahead of expirations. Check Upcoming Reminders and Expiring Soon so nothing lapses before you've asked for a renewal.
Add, invite, and track every vendor
The Vendors screen lists everyone you work with. Each row shows the vendor and contact, their Trade, a Compliance bar, a Risk level, and a Status, plus edit and delete actions.
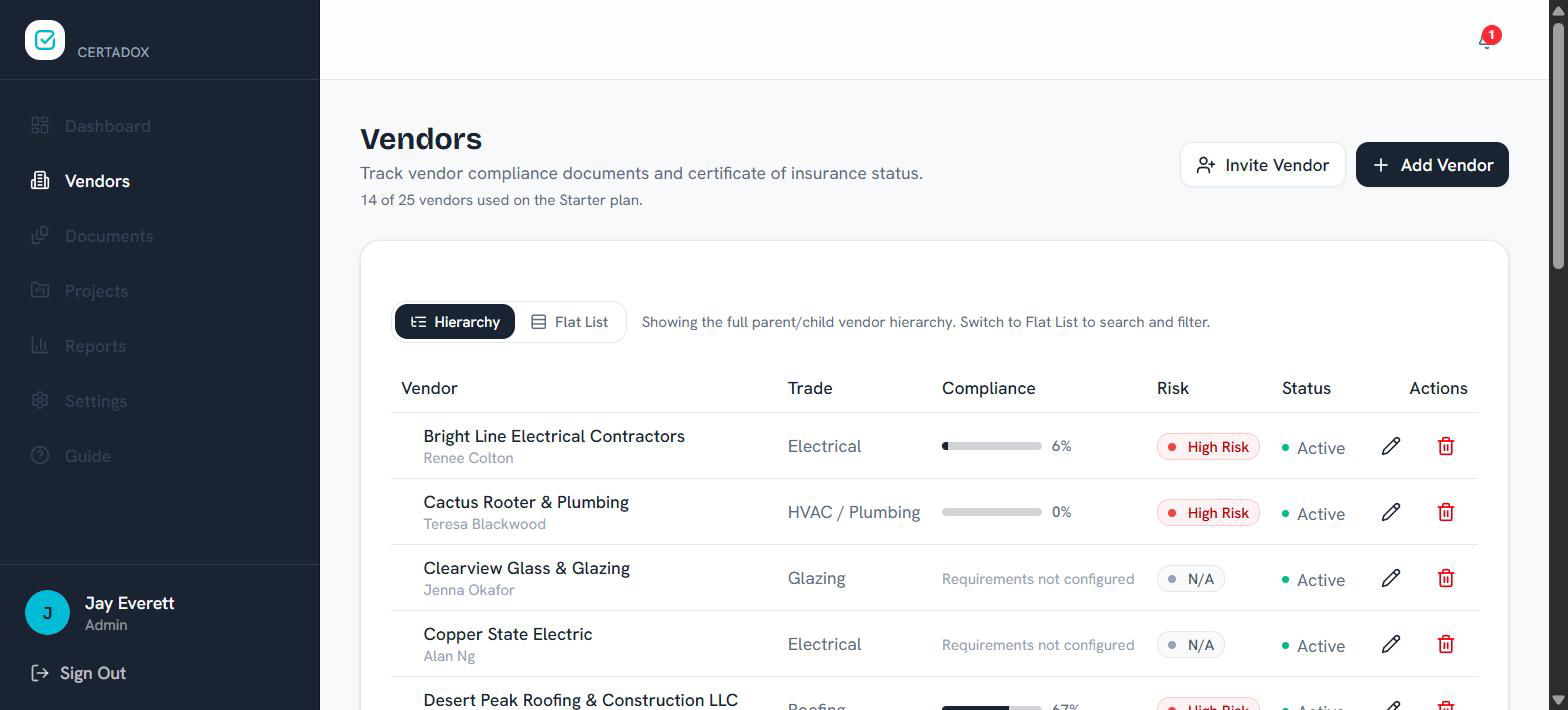
Use the Hierarchy / Flat List toggle to switch between a parent/child view and a searchable flat table. The counter (e.g. “14 of 25 vendors used”) reflects your plan limit. Two buttons add vendors:
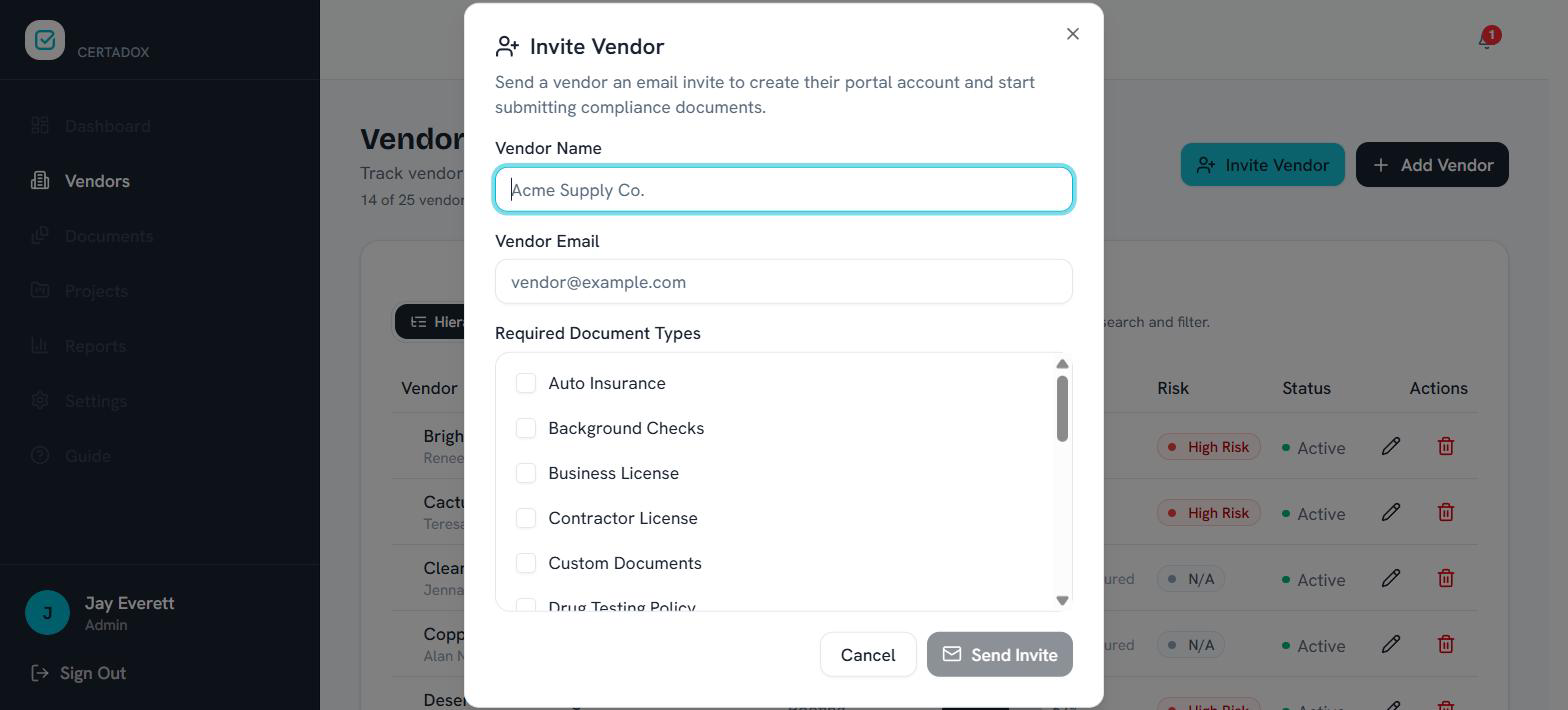
Invite Vendor
email them a portal link to upload their own documents
Add Vendor
create the record yourself and upload on their behalf
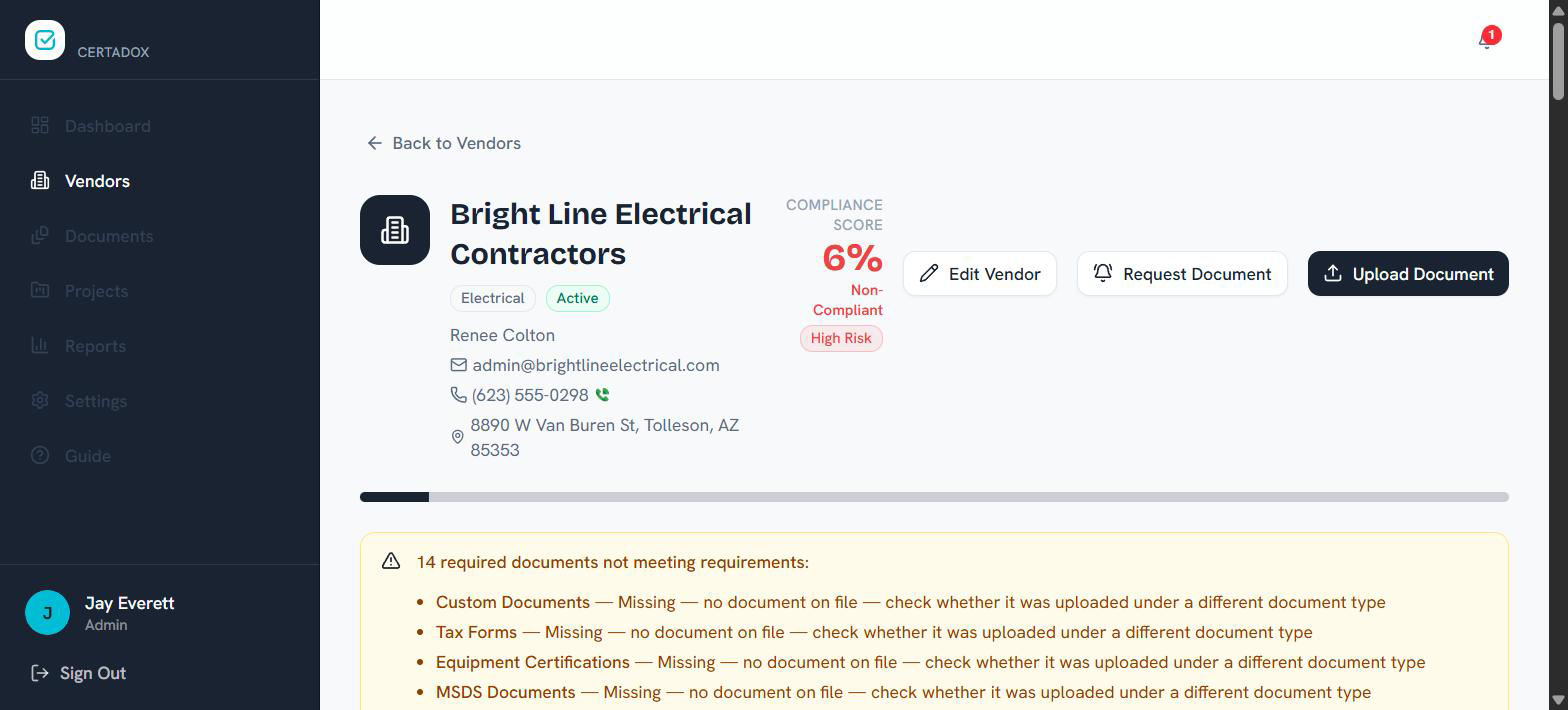
Click any vendor to open their profile. The header shows contact details, the vendor's Compliance Score and risk level, and three actions: Edit Vendor, Request Document, and Upload Document. A yellow banner summarizes every requirement not yet met.
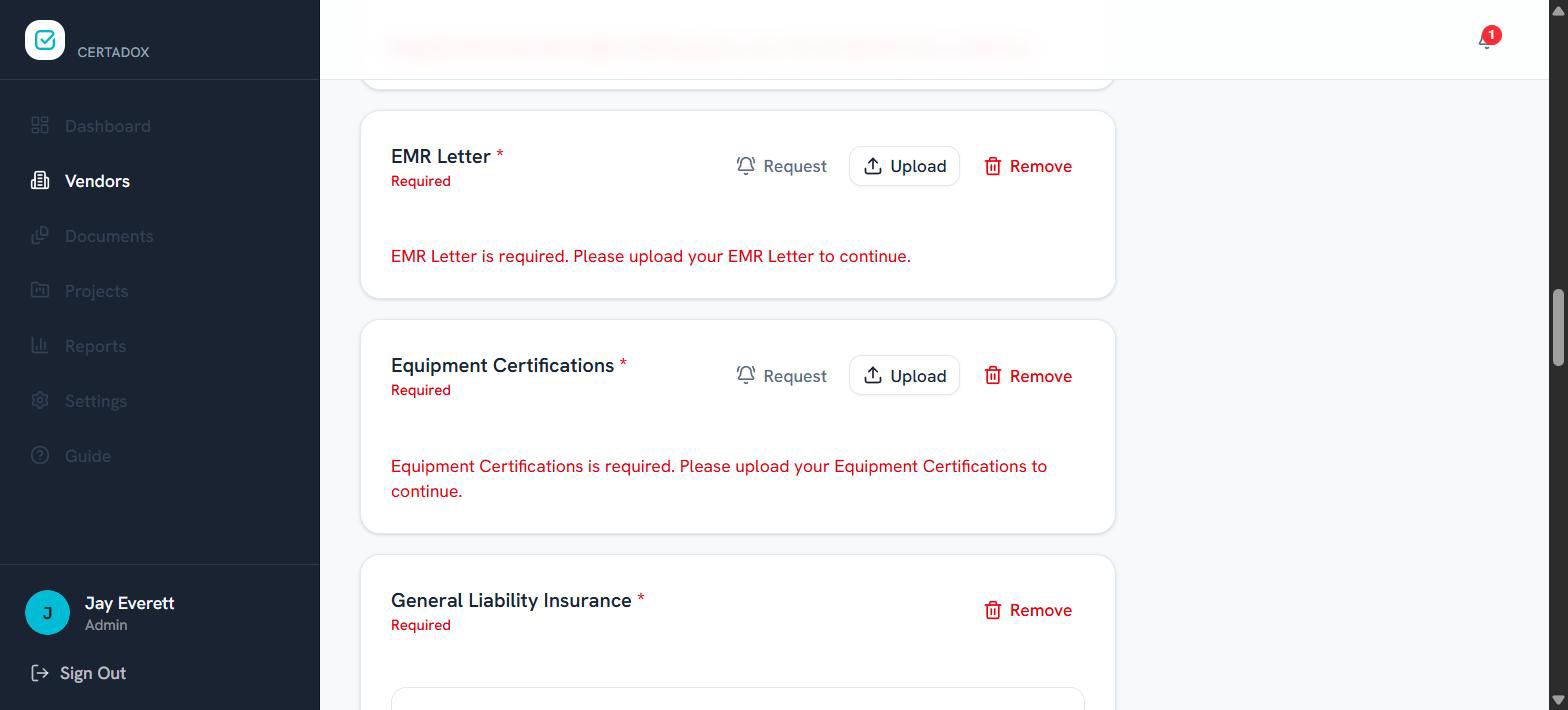
Below that, Required Documents lists each document this vendor must provide. For anything still outstanding you can Request it (emails the vendor), Upload it yourself, or Remove the requirement.
Automatic document compliance checks
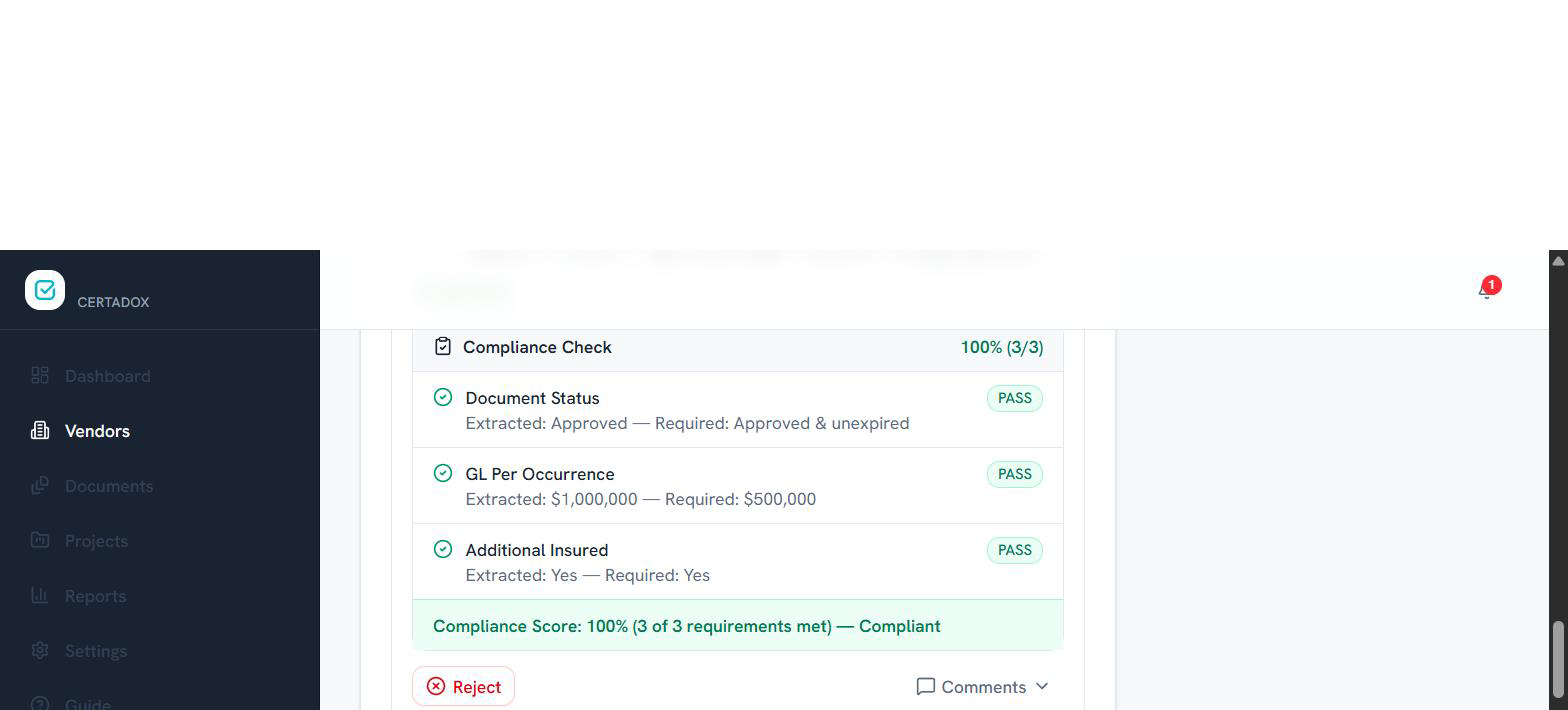
When a document is uploaded, Certadox reads it and compares what it extracted against your requirements — line by line. Each rule gets a PASS or FAIL, with the extracted value shown next to what was required, and an overall compliance score for that document.
- 1
Open the document card. On the vendor's profile (or from Documents), find the item marked Pending Review.
- 2
Read the check. Confirm each row's extracted value against the requirement. Anything that failed is called out in red.
- 3
Decide. Choose Approve, Reject, or Needs Info. Add a comment to tell the vendor what to fix.
One library for every file
Where Vendors is organized by who, Documents is organized by file. It's every compliance document across all vendors in a single, searchable table.
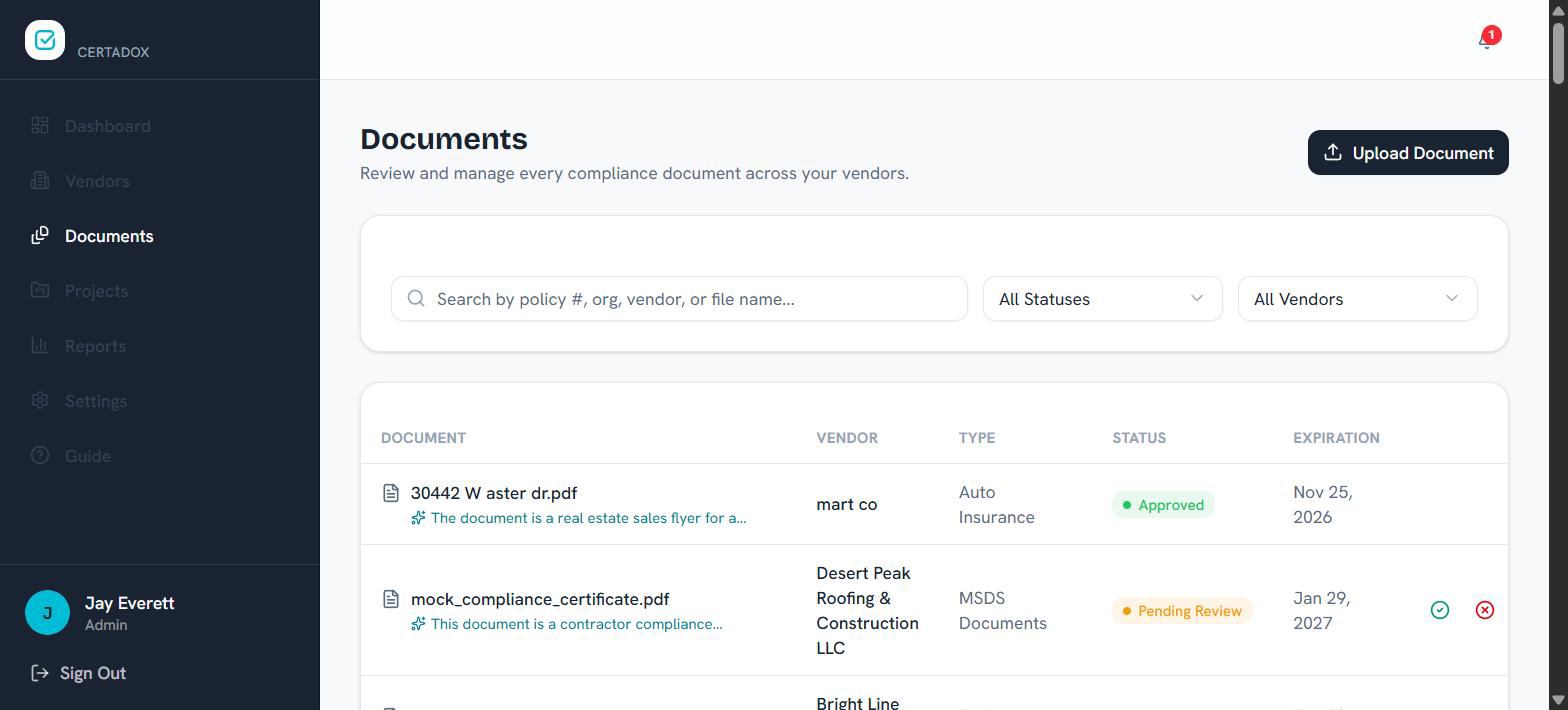
Columns show the Document, Vendor, Type, Status, Expiration, and quick actions. Under each file name is a short AI summary of the contents, often with a “Flagged” note when something looks off (for example, a file that doesn't actually contain the insurance it was filed under). Status badges read Approved, Pending Review, or a rejected state.
How to use it- 1
Filter to what needs action. Set the status filter to Pending Review to see only documents awaiting a decision.
- 2
Find a specific file fast. Search by policy number, carrier, vendor, or file name instead of scrolling.
- 3
Act inline. Approve or reject pending documents from the row, or open one to see the full compliance check.
- 4
Upload centrally. Use Upload Document to add a file and attach it to the right vendor and type.
Track compliance per job site
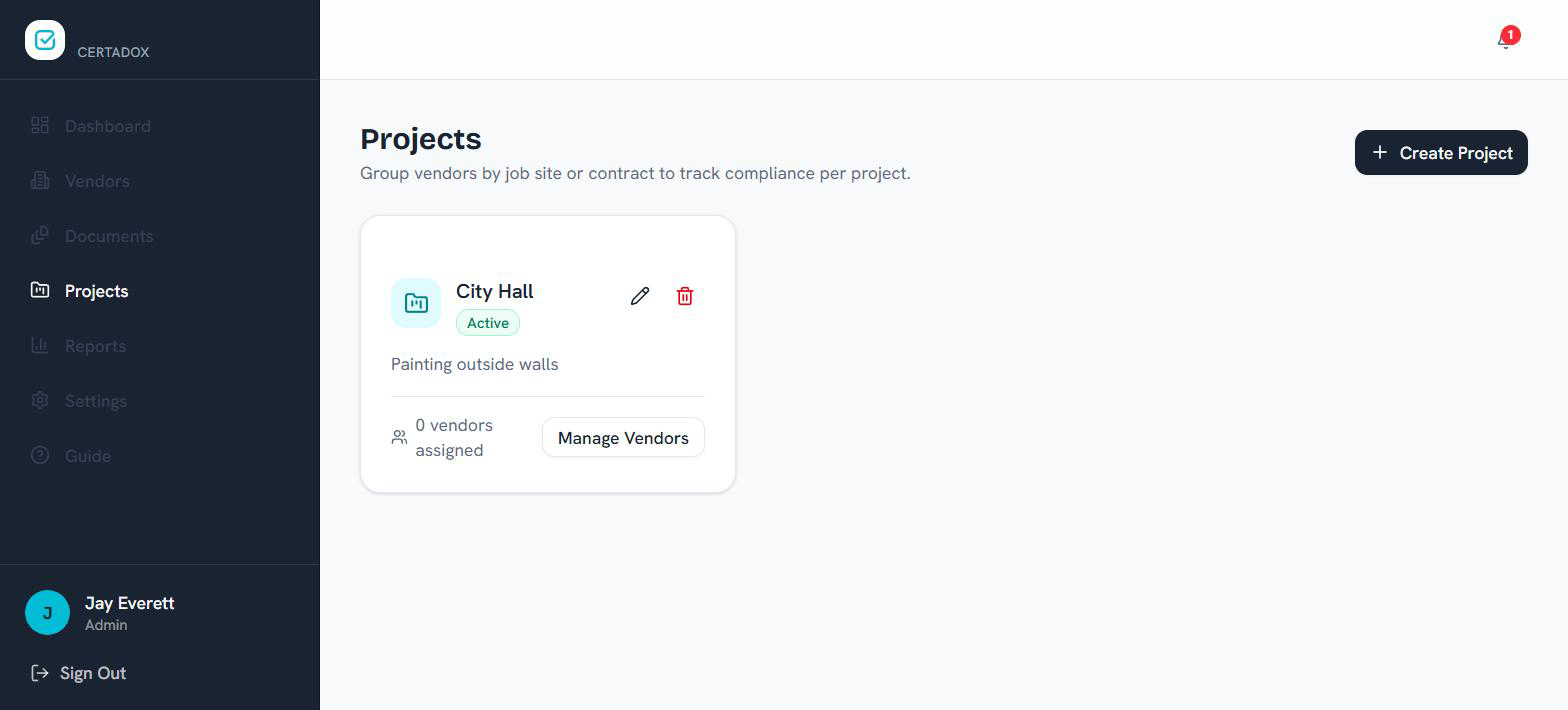
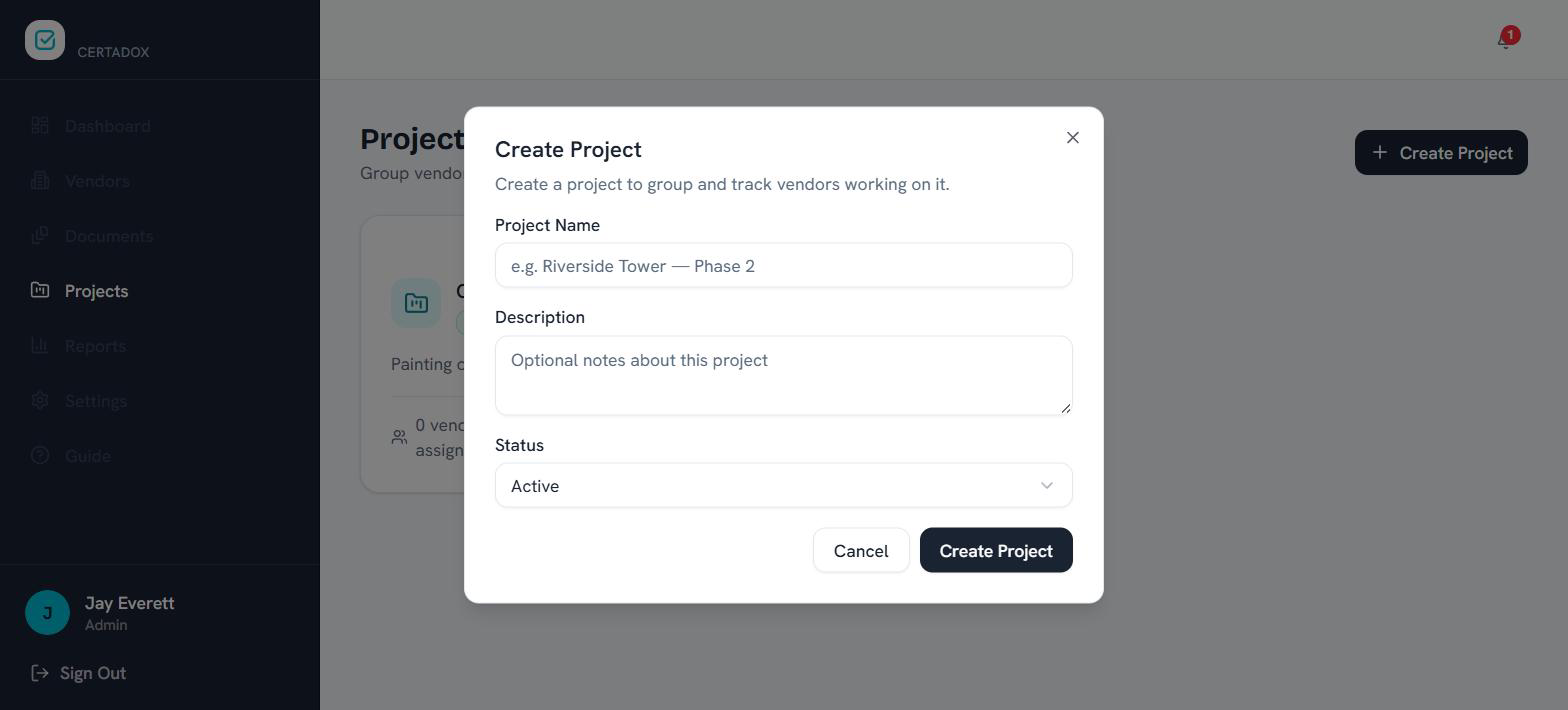
Projects let you group vendors by job site or contract, so you can see compliance for a specific job rather than your whole vendor base.
- 1
Create the project. Click Create Project, name it (e.g. “Riverside Tower — Phase 2”), add a description, and set it Active.
- 2
Assign vendors. Open the project card's Manage Vendors to attach the vendors working that job.
- 3
Monitor it. The card shows how many vendors are assigned so you can confirm everyone on site is covered before work starts.
Export data for audits and reviews
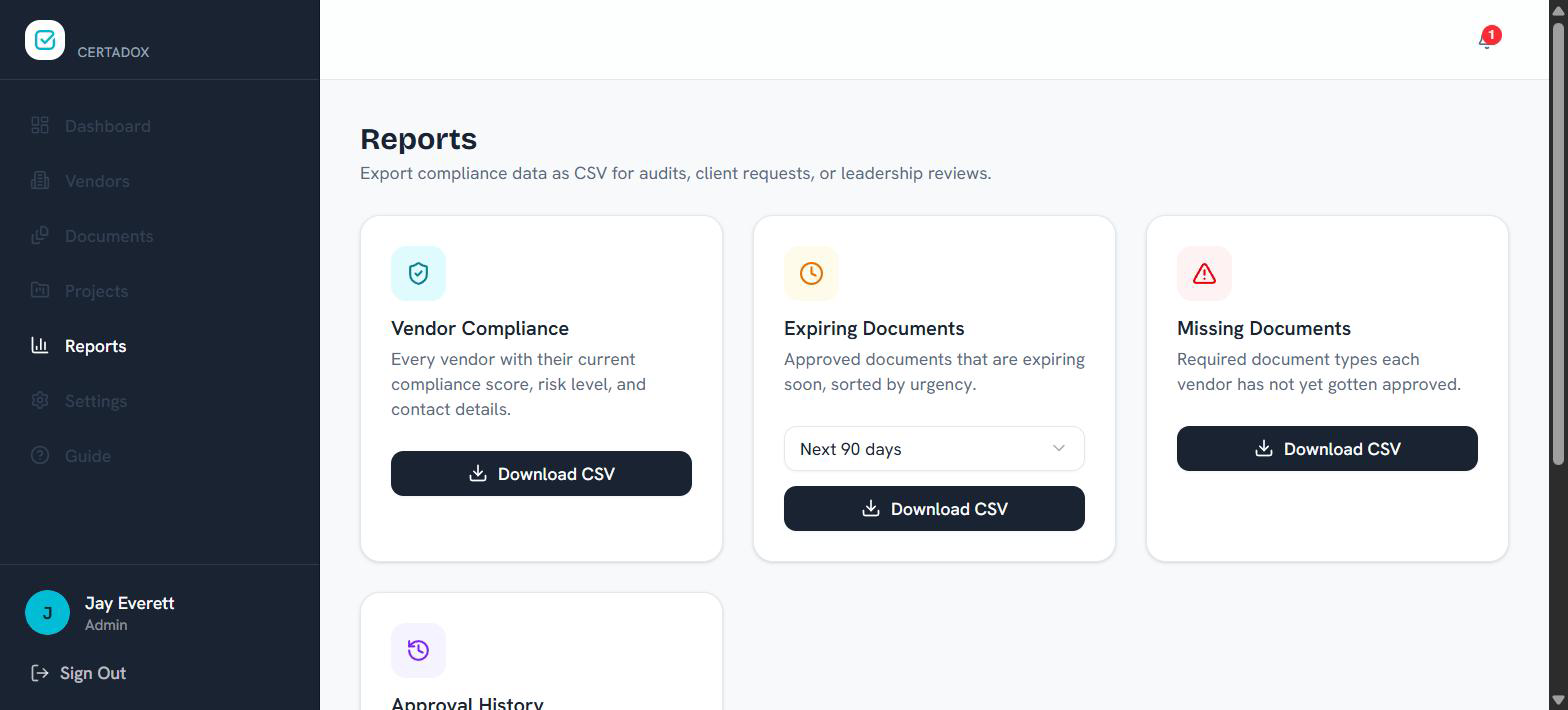
Reports turns your live compliance data into CSV files you can hand to auditors, clients, or leadership. Each report is generated in real time from your current vendors and documents.
- 1
Pick the report. Choose the one that matches your request — e.g. Approval History for an audit.
- 2
Set options if shown. For Expiring Documents, select the time window first.
- 3
Download CSV. The file opens directly and can be shared or dropped into Excel or Google Sheets.
Configure your account — do this first
Settings is where the whole system gets its rules. New accounts should start here: your Document Requirements are what every automatic compliance check is measured against.
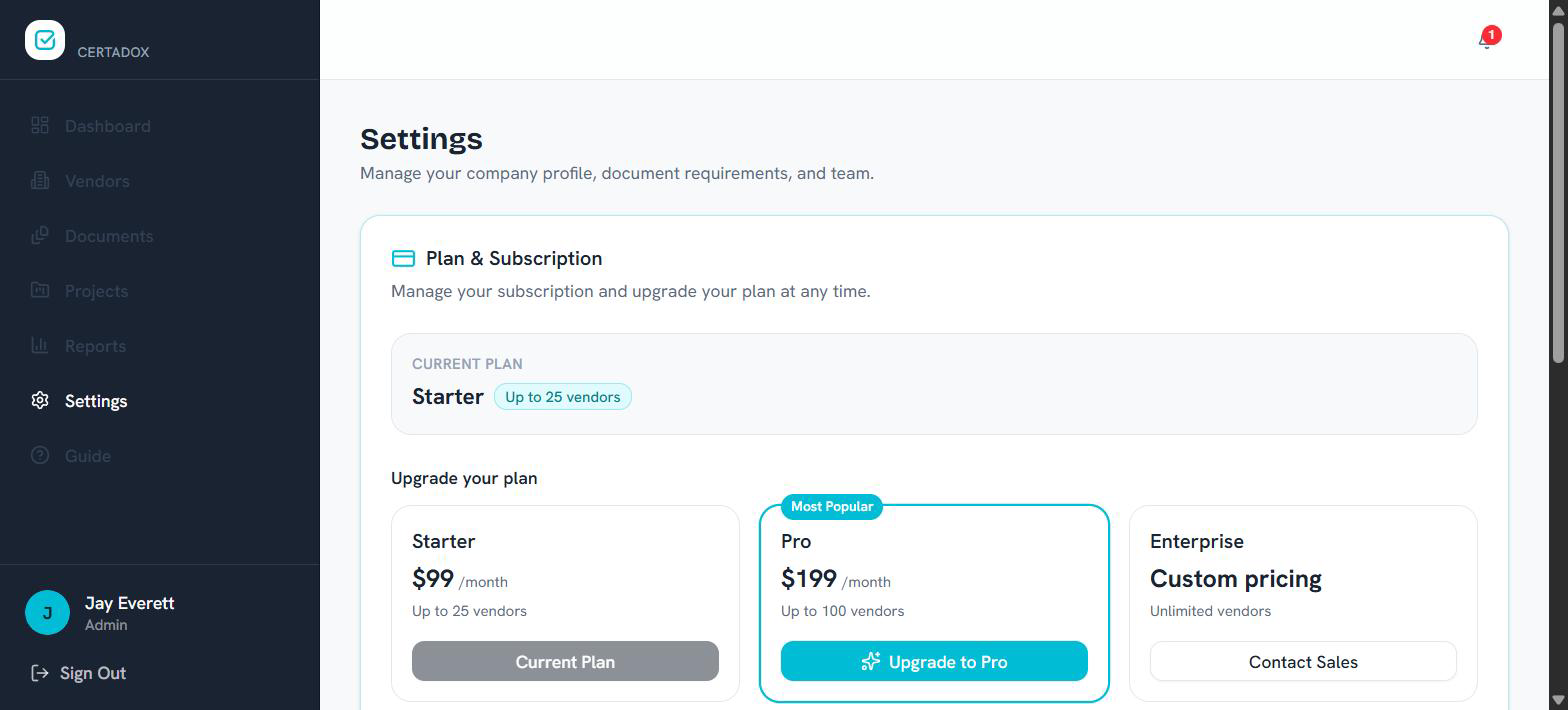
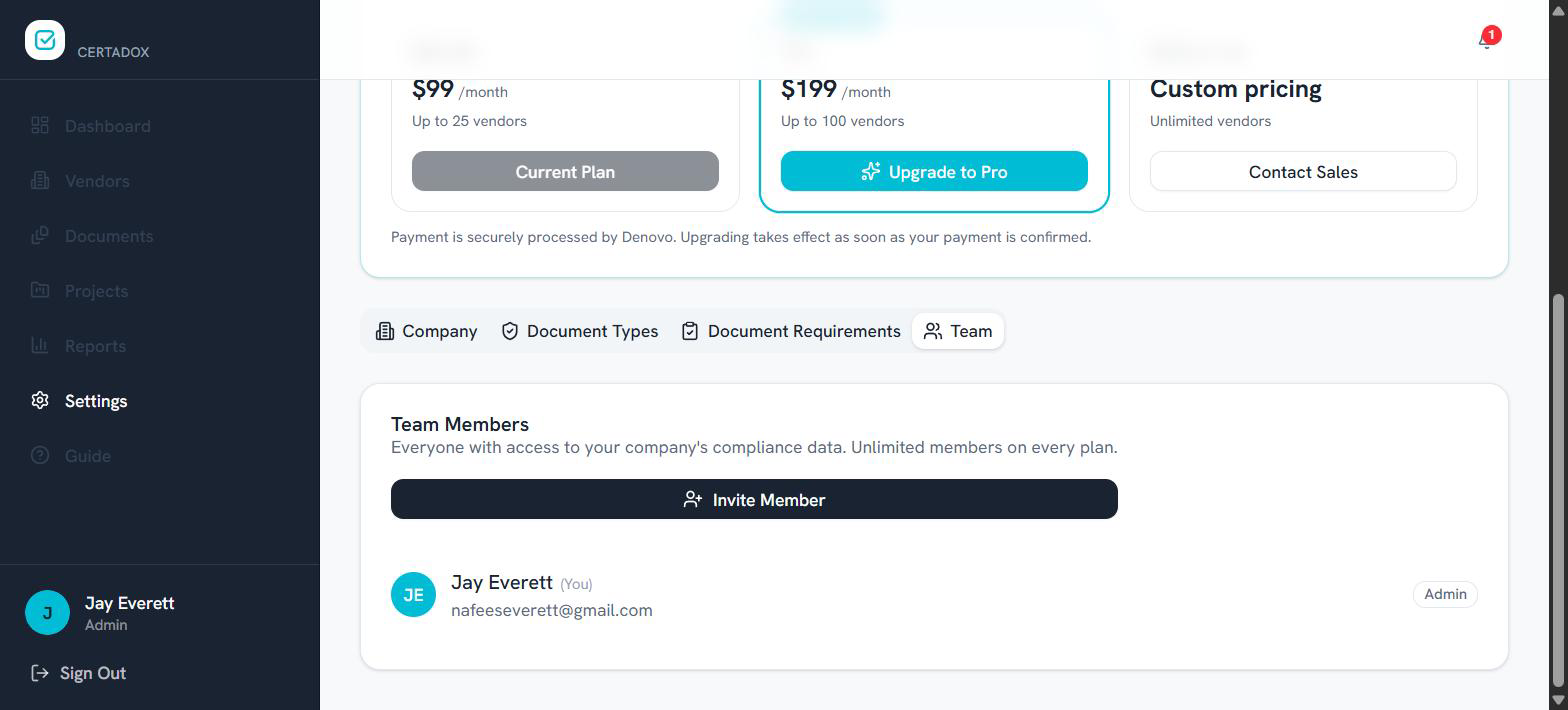
The top of the page is Plan & Subscription — your current plan and vendor limit, with options to upgrade. Below it, four tabs organize the rest:
Company
name & logo shown in the sidebar and on reports
Document Types
the catalog of document kinds you track
Document Requirements
coverage minimums per trade
Team
who can access your compliance data
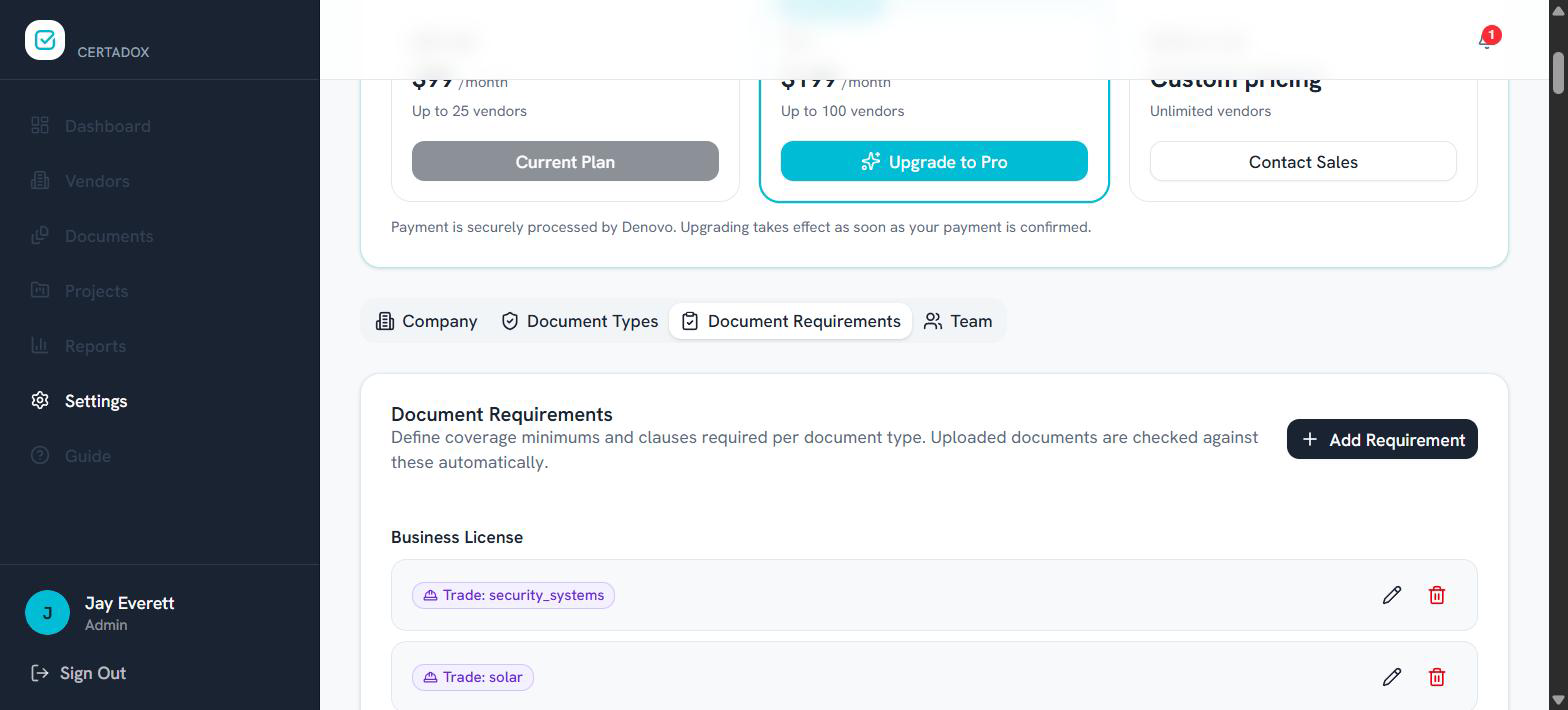
Document Requirements — the rules behind every check
For each document type you can define, per trade, the coverage minimums and clauses that must be present — e.g. a General Liability per-occurrence limit of $500,000 with an “additional insured” clause. Every uploaded document is scored automatically against these values.
Team — add the people who review
- 1
Set your company profile. Name and logo appear in the sidebar and on exported reports.
- 2
Confirm your document types. Make sure the kinds of documents you care about exist in the catalog.
- 3
Define requirements per trade. This is what makes the automatic PASS/FAIL checks meaningful — do it before inviting vendors.
- 4
Invite your team. Add reviewers so approvals aren't bottlenecked on one person.
How do I…?
…add my first vendor? Vendors → Invite Vendor (they upload their own documents) or Add Vendor (you create the record). Tick the required document types when inviting.
…ask a vendor for a missing document? Open the vendor, find the document card, and click Request — or use Request Document at the top of their profile. Certadox emails them.
…approve or reject a document? Open it from Documents or the vendor's profile, read the compliance check, then choose Approve, Reject, or Needs Info with a comment.
…change what a trade is required to carry? Settings → Document Requirements. Edit the coverage minimums and clauses; future uploads are checked against the new rule.
…see what's expiring? Dashboard (Expiring Soon / Upcoming Reminders) for a live view, or Reports → Expiring Documents to export a dated list.
…prove compliance for one job site? Create a Project, assign the vendors on that site, and track the project's status.
…give my auditor a record? Reports → Approval History exports the full audit trail of every decision as a CSV.
…add a coworker? Settings → Team → Invite Member. Team members are unlimited on every plan.
Glossary
One habit to build: start each week on the Dashboard, clear Pending Reviews, then chase anything under Missing or Expiring. That single routine keeps your score green.
Ready to put this into practice?
Start your free trial and set up your first vendor compliance requirements today.
Have a question this guide doesn't answer? Email support@certadox.com. Thank you for choosing Certadox.